Volgers

Posts tonen met het label conservatory. Alle posts tonen

zondag 19 september 2010

Step by step

Sometimes I think I must be the clumsiest miniaturist. I don't see any of you damaging their wallpaper when you're not working on it, cutting grass-paper 3 times and still too short, trying paint-techniques on the good piece of grass-paper (instead of the remainder after cutting), ... Oh well, I get there, slowly progressing step by step.
The spot on the wallpaper is covered by a bouquet of dried flowers (some real flowers fit the miniature world perfectly). You can see the new windowsills on this photo too.
Next to it is the door with the new hinges. They match the handle well, after I removed the black paint on them.
Two snails found their way on the outside of the conservatory.
I had to make close-ups of them, as one has to take a very good look to spot them on the next picture. I made the second wall around the garden. Now I have to finish the gate, and then paint it. As I said, I cut grass-paper from a model-train-shop to fit the garden, which it does, more or less. But I guess I can fill gaps between wall and paper with plants, like one would have in real life, as the mower can't cut the grass close to the wall. The grass is not glued yet. I need to paint the walls first.
I thought the grass-paper was too yellow, even though I bought the darkest shade. I tried various ways to paint it, and had a very nice result by spraying a solution of watercolour on it. A brush flattens the grass too much.
I end with another picture of the lion-tap. I know I've shown this before, but I like the result much.

Have a nice week,
Marit

zondag 5 september 2010

On the wall

My projects stood on the same tables where I do my miniature work, always taking a lot of space. And now also the structure of the conservatory is becoming more fragile, so I thought it was time to give them their place on the wall.
My hobbyroom has the shape of an 'L', and this temporary desk in the foot of the L is where my computer stands (behind the cottage). It's a nice and secure place for my projects. The rest of the room is working area, where things can be made... or broken...
To see how it would look best on the wall, I tried it on the floor. But now it's on the wall, I think the conservatory should hang higher. Oh well...
The left cupboard is made for cd's, but I will make a fairytale collection of it, with in every box another scene with fairies, gnomes, a witch, or ... So many plans, so little time! But now it's up the wall, I finally may have the room to work on it.
I do see that history repeats itselve. I started on the beachhouse, soon I had to devide my time between the beachhouse and the conservatory, and now -without coming close to finishing those two projects- I'm thinking about starting on the third one... At the end of my life I'm probably surrounded by loads of dollshouses and boxes, without any of them being finished. I can't say I mind. Working on them is the fun part. I might enjoy the house less when it's ready.


As for the conservatory: the new glass has been put in, I've made windowsills and I started on the outer wall of the garden.

And now I'm going outside to enjoy the sun (after having had weeeeeeks of rain)!
Marit

maandag 2 augustus 2010

Little creatures

I want to finish the base of the conservatory, so I can glue it on the wall and shelf, but this sure isn't my best week.
I've put scrappaper beneath the windows, and the windowsills are ready to be put in, but first I had to glue the acryllic glass back in again. But the glue I used reacted with the acryllic glass, didn't glue, became runny and left white stains on it... In other words: the glass is ruined. In the proces I pushed a window ornament out (easy to fix) and broke one of the hinges of the door (beyond repairing). So I need new glass and hinges, before I can go further here.

I thought I could make some small creatures of Fimo, to live in the garden. Here they are:


A hanging mouse:

A mouse on a pin (to put on a stem of a plant or flower):

A dragonfly (only 5 mm in lenght, with 6 legs and musquito-wings!):

A mole:

And 5 snails:
Yes, I did say 5, I did make 5, but one never made it to the oven (was found in my hair (?) later), and the other two with real snail-houses didn't survive my clumsyness... (see first picture) As I said, this week was not a good week for me to work in miniature.

They all need a bit of paint and some need some flock, but even the mega-scrap-shop nearby didn't have that, did not even know it exists. Thank God for webshops! Now I just have to wait till the postman brings me my glass, hinges and flock (and the other nice stuff I saw in those webshops ;) ). 

Have a nice week!

Marit

zondag 25 juli 2010

Backwall

A conservatory usually doesn't stand on its own, so I needed to make a wall, behind which the rest of the house would be. So last week I have been busy with self-drying clay and paint. Here is the result:


The lion-plate with tap is bought. It just needed painting.

And here is how I did it:

First I've put the clay in place. It doesn't need to be flat. Then I sketched the stones, following the lines of the unflatness, making stones in various sizes. On the right you see the next step: defining and shaping each stone. On some stones I made cracks and bumps. Then the whole wall gets texture by beating and stroking with a firm brush. I applied several layers of paint, but also gave a few stones one layer of a different colour, so not all stones will have the same colour. It needs a bit of variation to look realistic.

To show my husband what I did, I placed the lion-plate on the wall, and it stayed there while drying. That was by accident quite a good choice, as the clay shrinks on drying. With the plate in place, it kept his place. It was quite stuck after a few days of drying!

I still need to add moss, climbing plants, a little bird-nest in a hole between the stones, etc, but so far I am pleased with the result.

Update on my cat: he still sleeps a lot and surely has muscle pain, but he's doing very well. You already said it to me: cats are really tough creatures!

Marit

maandag 19 juli 2010

Finished bench

It got late last night, but I finished the bench!
Did you notice the M before?


Inside I've put a pink lining in contrast with the turquoise colour beneath the white paint.


 It will get a place in my conservatory.

 Left, right, I'm not sure yet.

It took 4 layers of white to cover the turquoise, and when it was fully covered, I sanded it again, showing the turquoise and bare wood, to give it a used look. It still feels silly to 'damage' a neatly painted piece, but I do like the effect, giving a dolls house the feel like it's being lived in, a home, instead of a show piece.

Hope you had a nice weekend full miniatures to enjoy as well.

Marit

maandag 12 juli 2010

Start on furniture for the conservatory

I'm starting on a new piece of furniture for the conservatory. So far I only made small things, or used ready made furniture for a start. So I'm quite curious if I will succeed in making it the way it is in my head from scratch.
It is supposed to become a small bench, with storage beneath the seat.

Marit 

maandag 24 mei 2010

A shelf for the conservatory

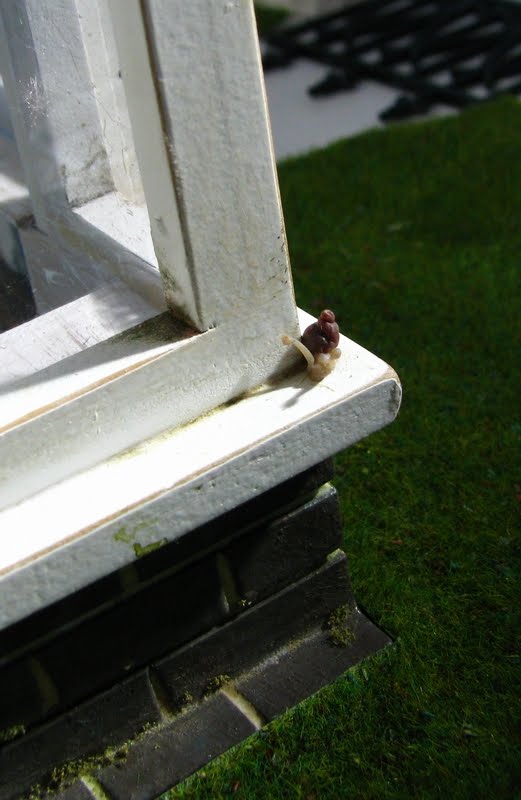
My husband made me a shelf for the conservatory.

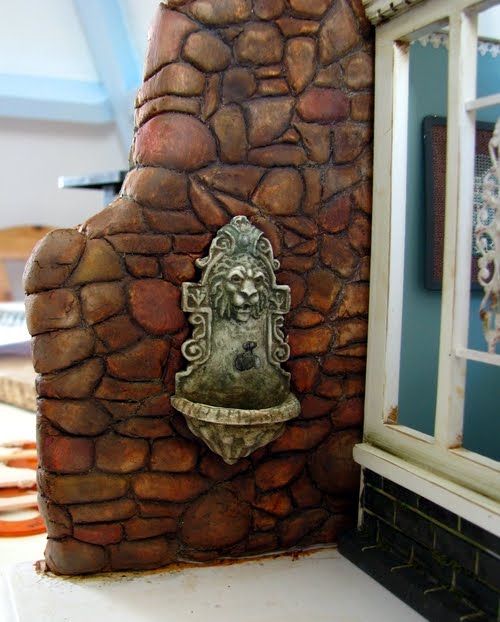
The shelf still needs a second coat of paint, but then again, much of the white will not be visible later, as the ground will get grass and a path. It's nice to see how it gets shape now. I want to make a stone wall at the back, like the conservatory is placed against that wall. Then a low wall surrounding it, with the 'metal' fence on it. I won't be using the entire fence, just the upper halve.
As you can see, I also made some hydrangas from a kit.

The thing I like about this kit is that it had flowers in it with different sizes and different shades of blue, making it more realistic. I still need to add some leaves, I think. I also think I need to add some more colour variation on the leaves. The pots are bought, but adjusted to my taste (other knobs, painted, made older, etc).
Also some other goodies I bought for the conservatory. There's more, too much for just this conservatory, but these certainly will get a place here.
As promised the progress on the birdcage-stand, which my husband makes for me:

The stand will get an other birdcage though. I think a cage with a 'tower' on each side will look more beautiful! I also want to combine wire with wood on it. The stand itselve is not ready yet: it needs curls made of iron threads. One curl is easy, but how do you get more curls which look the same? Any suggestions?

Bye for now,
Marit

woensdag 31 maart 2010

Slow progress

I made this little heart the way I descibed in the post before this one. I used a rubber mat to make the heart extra hollow. I made the edges flat again by using the embossing pen on the other side of the heart. I made two hearts and glued them together with the knot of the thread on the inside. It now hangs on the shelf.

The shelf hangs by the use of magnetic tape and a metal sheet. The magnetic tape is not very strong. It's designed for the use on paper, so one can put up photo's or children's drawings on the fridge or on a wall which has been painted with iron-paint. My husband is getting me stronger, industrial magnetic tape, but this will do for now.
I also put up the embroidery the same way. I'm not totally happy with the way it's framed. I wanted to use a passe-partout, but I didn't get it straight.

Yes, the door hangs too, including cat-flip. Blacky still figures out if he will like this or not... My real cat only uses it when he's not able to convince one of us to open the door for him, he has such a hard life! ;)

I had much trouble getting the hinges of the door right. This is the third type of hinge I tried, and it finally worked.
I used coloured plastic in the window of the door. I want to put a light behind the door, like if the lights are on in the non-existing house. The colours are not very visible on the picture, but are two types of blue.

This is all for now. It goes much slower than I would wish to, but my life is not a Harry Potter movie, so I can only use my time once, and not much on dollshouses lately.

Happy Easter!
Marit

woensdag 3 maart 2010

Update conservatory

As promised: an update on my conservatory. This is how it looks now:
I cannot work on one thing alone: my mind is already busy with the next thing, and I can't help starting on that too. So I did a few other things, while busy on the door and not having finished my embroidery yet. 
The bricks outside were high gloss red, very ugly, so I painted them in a blended mat grey. I redid the joints, and afterwards painted them with watercolour, as they were too white. Then I added some moss. Still need to add some moss to the rest of the conservatory as well, looks great. This is the result:
I had bought some ornaments for the windows at Bindels Ornaments. They sell all kinds of metal ornamental pieces for the use in dollshouses. Of course the ornaments were 'golden', so they needed to be painted white and then made old, rusty and dirty.


I think the result is more beautiful then shows on the pictures!
Then of course, I still busy with the door to the none-existing house. It takes lots and lots of layers of white paint to cover the dark grey beneath! I also made a small cupboard, which I gave the same dark grey treatment, before painting it white, again and again and again...


Now it needs to dry thoroughly before I can work on making the old look.

It looks here like spring is finally coming, but they say it's going to snow again this weekend... I'll see if it will be dollshouse or garden this weekend!

Bye for now,
Marit

zondag 24 januari 2010

Colour advice wanted

Today has been a bad day for my little black cat. I guess he tried to walk on thin ice, because he came back from his daily 5 min walk outside wet from tail to ears. He didn't let me help him dry, but I'm just so happy that he's alright! After he washed himself dry, I spoiled the poor thing by letting him sleep in our bed beneath the blanket. He hasn't left the spot all day!

I've been working on the conservatory again, the floor, the back wall and the door in the wall. The tiles are from Jennifer's Free Printables. I still need to do the joints, but I love the result.


The door will get a leaded window and a shutter for a cat (for me a house without a cat is no home). I want to make a used look by painting it with colour 1 and then with colour 2, and then sand the used parts, so colour 1 will show. But which colours? First I thought colour1 to be white, and colour 2 to be bluegreen like the wall, or a lighter shade. Then I thought colour 1 to be dark grey (which the red part of the outside will become as well) and colour 2 to be white. The light blue-ish grey of the tiles is also a good colour 1 or 2. Or... what do you think, what would you do?

Marit

zondag 10 januari 2010

Weather-vane

Recently I decided to get my conservatory out of storage to make a little garden-project of it, instead of adding it to my dream house (which I will build one day, if ever). The first miniature I made for my new project is this weather-vane:


It's not only decorative, it also works, of course. Here some pictures of the making process:


The ornaments are from Tiny Turnings, I sawed the arrow and the bird.
So far, all I made has been made pretty, well painted, clean, just the way you would buy it in a shop. In real life I do not like the old look given to new furniture by sanding the corners, adding uneveness and sometimes even a dirty glaze. In my opinion new needs to look new, and things with history may show history, but not too much. Your work, and also the book of Lea Frisoni, made me see that in a dollshouse a used look adds charm, makes a dollshouse more realistic. So I did the unnatural thing: after finishing my beautiful weather-vane, I made it ugly and dirty. I did the same to the conservatory, and then added the weather-vane. I'm quite happy with the result, but also a bit sad about the loss of beauty... Here's the result:

I hope to show you more of the garden-project soon.

Bye for now,
Marit